 Low Online Discount Prices
 Next Day Delivery On Certain Items
 Safe and Secure Online Checkout
 Big Name Brand Discounts
Our bathrooms are hives for grunge and grime, which is no surprise considering how frequently they are used. In fact, our own research revealed that the average bathroom contains 764 bacteria per square inch, highlighting just how unhygienic our bathrooms really are.
Our bathroom tiles are no exception as they can quickly become worn, dull and lifeless. If you’re wondering how to revive bathroom tiles without replacing them, we’re on hand to explain three ways you can spruce up your tiles and give your bathroom space a new lease of life!
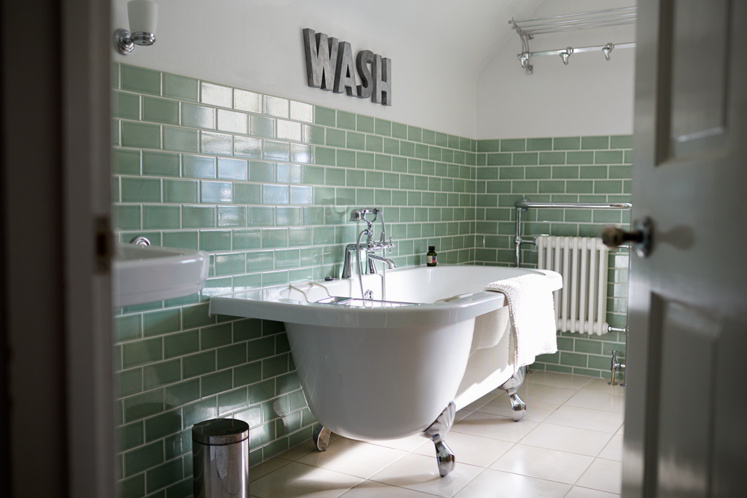
Photo Credit: Monkey Business Images / Shutterstock
How Can You Revive Bathroom Tiles?
1. Deep Clean Your Tiles
If you are looking to give your bathroom tiles a makeover, the first place to start is by deep-cleaning them! Although this should be a routine task, in reality most people simply don’t have time to deep clean their bathroom wall tiles, or their bathroom floor tiles. After all, it can be a fairly time-consuming process and somewhat hard graft!
However, if you are wondering how to clean bathroom tiles enough to revive them, then these are some of the best and most effective ways to clean bathroom tiles.
– What is the best way to clean bathroom tiles?
Regardless of what solution you apply, you should always run hot water in your bathroom for a few minutes as this encourages the ceramic pores of your tiles to open up, thus exposing these and giving you greater access to the dirt when cleaning. Whilst cleaning, ensure that you are not pressing too harshly on the tiles and that you are opting for a constant, gentle brushing motion to protect the surface of the tile. After the solution has been applied for some time, you should rinse it thoroughly with new, clean water and pat it dry with a towel.
Don’t forget to tackle the bathroom tiles’ grout too since this is where mould and scum can quickly build up and ruin the room’s aesthetic. Due to the shape and size of grout, we would advise that you use the same cleaning solutions as the tiles, but apply and rub this using a toothbrush in order to reach all problem areas.
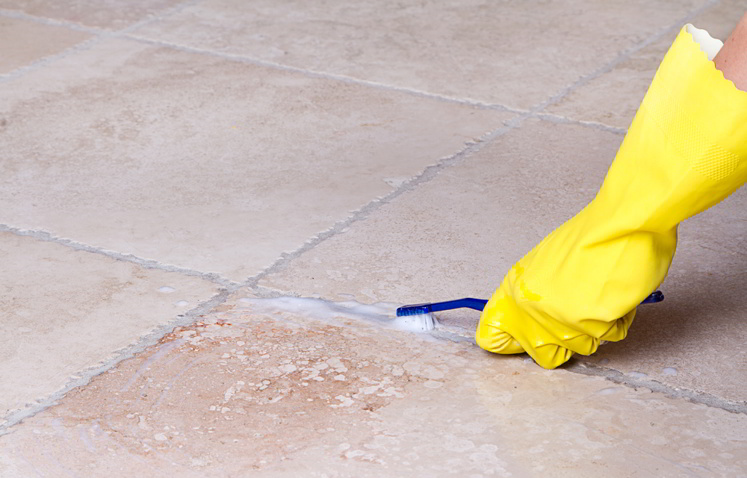
Photo Credit: Jenn Huls / Shutterstock
– What shall I use to clean my bathroom tiles?
- Natural Solutions
If you are keen to opt for an effective yet natural remedy to clean your old bathroom tiles, then baking soda and vinegar may just become your bathroom’s best friends. Depending on how severe the dirt and grime build up on your tiles is, you can either dust the tiles over with a coating of baking soda and then scrub this away with a non-abrasive brush or sponge for a quick and easy finish.
However, if you are looking for a more intense revival or to target certain problem areas, then you may want to introduce a stronger solution and combine the baking soda and vinegar until it becomes a thick paste and apply this instead, wiping away again with a non-abrasive sponge to protect the tiles from scratches and chips.
- Supermarket Solutions
Alternatively, you can opt for a considerably tougher solution to really tackle soap scum and stubborn grime. Any reputable lime scale remover will be suitable as this dissolves any remnants of soap and grime.
However, we would say to be wary of formulas which risk damaging the surface of your tiles due to their harshness, particularly if you have expensive tiles. Again, you should avoid applying and rubbing this solution with an abrasive material.
For even more revolutionary tips on how to keep your bathroom gleaming, check out these 22 cleaning hacks!
2. Paint Your Tiles
Another great way to revive your bathroom tiles is a lick of paint. Although it is a relatively simple process, we have some tips and tricks to guarantee a better finish overall!
– Can I paint over bathroom tiles?
Painting over bathroom tiles can be a great alternative to replacing your bathroom tiles and restyling them. However, depending on the finish that you are looking for, you should be prepared to remove at least most of the grout and re-grout the tiles, else you risk them looking blatantly painted.
Fortunately, this isn’t as tedious of a task as replacing the tiles altogether is, so it is still a good idea to paint over bathroom tiles if you’re looking to revive your bathroom.
– What paint can I use for bathroom tiles?
Firstly, it is a good idea to research which paint is best for your tiles and how much paint you need to complete the job. Many people are curious about what paint can be used for bathroom tile renovations, but the answer is simple – tile paint.
Paint for bathroom tiles needs to be specifically designed for tile surfaces in order to be durable, mould-resistant and fit for the bathroom. For example, paint ranges such as Dulux Tile Paint or Ronseal One Coat Tile Paint are the most popular option amongst those seeking to renovate their bathroom without replacing their tiles. Often, most people will look for the brand that offers the best colour options and finish for their bathroom. If you’re looking for bathroom tile ideas or inspiration, it is always a good idea to check out sites like Pinterest where interior designers and homeowners are keen to share their ideas and photos.
After choosing the paint and colour for your bathroom, it is a good idea to measure your bathroom walls to determine how much paint you will need. Fortunately, most paint tins will describe how many metres their tub will cover, making this calculation fairly straight forward!
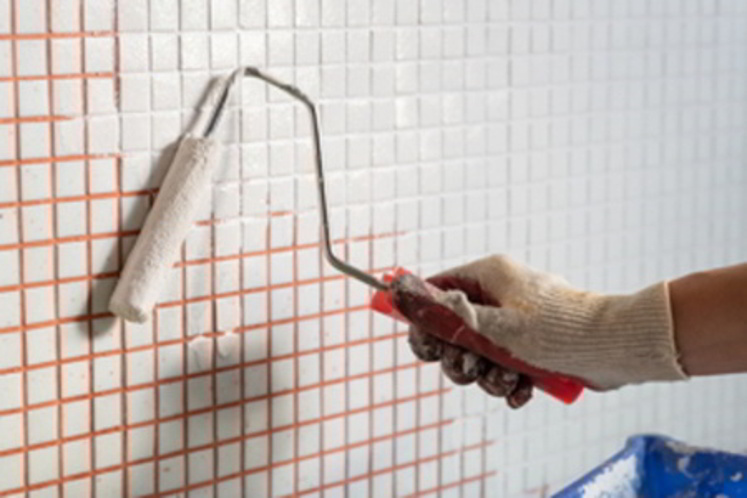
Photo Credit: Sergey Spritnyuk / Shutterstock
How to paint your bathroom tiles in 8 simple steps:
Step 1 – Remove grout
It is usually a good idea to remove a fair amount of grout from the tiles if you’re looking for a more polished finish. The more grout that you are able to remove, the better. Fortunately, there are plenty of grout removal tools available in hardware stores and online which can help with quick, easy and effective grout removal.
Step 2 – Clean the tiles
Next, it is really important to thoroughly clean the bathroom tiles before painting them. Thorough cleaning is an important stage of the painting process since it ensures that all of the surfaces are clear and free of dust, grime and mould – all of which encourages the paint to sit better, last longer and appear more polished. In particular, we recommend spending as long as is required to remove any mould and grime if you want a neat and lasting finish from your paint.
Step 3 – Add primer
Although primer is optional, it is a good idea to use a prime tiles. Use paint that is specifically designed for tiles to even the surface and look of your bathroom tiles once painted. Remember, you should always find the right time to apply priming products since they need to dry for as long as the manufacturer describes – else you risk a sticky and uneven finish.
Step 4 – Sand the primer
Many experts will then go on to lightly sand the layer of primer to ensure that the paint itself has a good surface to adhere to. This can be done using sandpaper, with any excess dust cleaned thoroughly off using a wet cloth. You should then dry thoroughly before painting the tiles.
Step 5 – Paint the tiles
Next, you go in with the paint. This is simple – just paint an even coat over the tile surface and allow the tiles to dry, with good ventilation. To reach the more challenging edges and corners, we recommend a small synthetic brush that can push paint to all corners of the tile without leaving brush marks. As with any kind of painting, you require patience and time to do this as neatly and cleanly as possible. Depending on how dark or vibrant your desired finish is, you may need to apply additional coats. If you are looking to ensure a longer lasting finish, we recommend giving your tiles 3 or 4 coats of varnish.
Step 6 – Time to re-grout
Grout can be purchased in a whole host of colours and styles, from classic matte black to glamorous glitter. Mix the grout ingredients or grab some ready-mixed grout before using a small and intricate toll such as a small tiling trowel to push grout into all edges and cracks. Don’t be afraid to add more grout if it’s necessary!
Step 8 – The final clean
Once the grout is completely dry, you should re-clean the tiles. However, you should be wary of soaking the tiles within the first 24 hours as this might lead to quicker deterioration or ruin the finish. You can always use a wet sponge instead.

Showers and Shower Valves | Showers to You
3. Shine your bathroom tiles
Your final option is to shine your bathroom tiles – a process used to reverse the effects of hard water, soap scum and mould build up. Reviving the shine of your bathroom tiles is a cheap, simple and effective way to give your bathroom a new look. In fact, it is so simple and effective that we recommend this stage first. Too often, we think our tiles need replacing when really all they need is a little more care and restoration!
Our favourite shine restoration method is as follows:
1. Create a simple, non-chemical solution to clean your tiles with. Often this can be as minimal as hot water with a few drops of washing up liquid or soap.
2. Next, use a mop to target each tile, wiping continuously until clean.
3. Once clean, try to buff the tile surfaces with a microfiber cloth or dust mop to create a shiny finish.
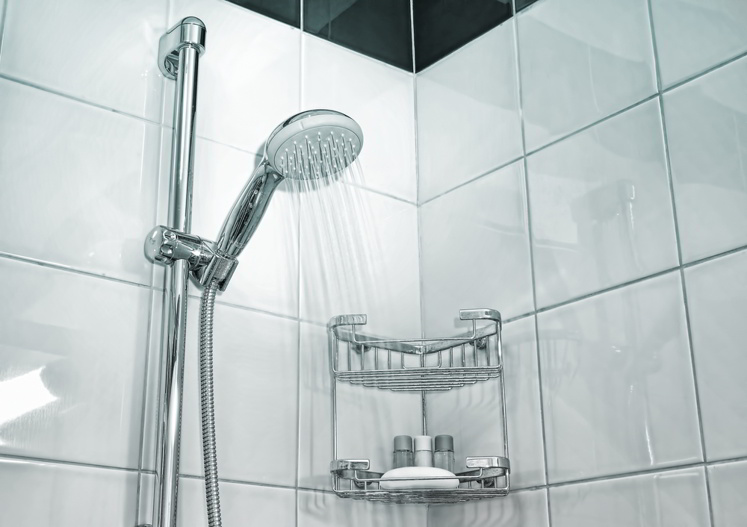
Photo Credit: Protasov AN / Shutterstock
To keep your bathroom clean and your tiles gleaming for as long as possible, it is a good idea to follow these as routine maintenance tips.
Of course, if you are looking for a complete renovation and are willing to invest, you can always replace your tiles altogether. Before going ahead, its important to consider how many tiles you need and how much it will cost – we’ve done the hard work for you and outlined the average cost of a bathroom renovation to help you out.
Feature image credit: Duntrune Studios / Shutterstock