Mould in the bathroom is a common issue that can quickly go from a minor annoyance to a major health concern if left unaddressed. In this comprehensive guide, Showers to You walks you through the process of identifying and safely removing mould from your bathroom. Following these step-by-step instructions and taking necessary precautions, you can restore your bathroom to a clean and healthy state.
Understanding the Mould Problem in the Bathroom
Mould thrives in damp, warm, and humid environments, making your bathroom an ideal breeding ground. Not only is it unsightly, but it can also lead to health issues such as allergies, respiratory problems, and the worsening of asthma symptoms, particularly in more vulnerable individuals. It’s not something to be taken lightly.
Recognising and Identifying Bathroom Mould
There are many types of bathroom mould, but the most common ones you’ll encounter are Cladosporium, Penicillium, Alternaria, and Stachybotrys, often called ‘black mould‘. Here’s how to identify them:
- Cladosporium: This mould is typically green, brown, or black and can grow on walls and other surfaces.
- Penicillium: Often blue or green, this mould can also lead to musty odours and is commonly found on walls and ceilings.
- Alternaria: Seen as dark green or brownish-black, this mould can grow on walls and around windows.
- Stachybotrys: Commonly known as black mould, it’s dark greenish-black and is mainly associated with water-damaged materials.
If you notice discolouration or staining on your bathroom surfaces, particularly in corners around the bath or areas with poor air circulation, mould may be the culprit.
Check out our detailed blog post on cleaning and maintaining a bathtub for more information.
Safety First: Precautions when Removing Mould
Before you begin, it’s crucial to consider the safety implications of dealing with mould. Protect yourself with the following measures:
- Wear protective clothing, including long sleeves, gloves, goggles, and a mask with a respirator.
- Ensure the area is well-ventilated by keeping windows open or using a fan.
- If using chemical cleaners, read the instructions carefully and follow them precisely.
- Consider using non-toxic removal options, such as vinegar, before resorting to harsh chemicals.
With safety in mind, you can confidently move on to mould removal.
Tools and Materials You Will Need
Gather these items before you start:
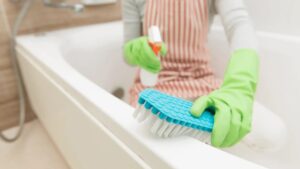
- Scrub brush or sponge
- Spray bottle
- Mould and mildew-resistant cleaning solution (You can use a non-toxic solution of vinegar and water or a specifically formulated bathroom cleaner)
- Bleach (as a last resort and only for non-porous surfaces)
- Gloves
- A step stool or ladder (if necessary for high areas)
Having the right tools on hand will make the process more efficient and less hassle.
 Step-by-Step Mould Removal Process
For Tiles and Non-Porous Surfaces
- Start by vacuuming the area to prevent the spread of spores.
- Prepare your cleaning solution in a spray bottle. If using a store-bought cleaner, follow the instructions on the label. Mix equal parts of water and white vinegar in a spray bottle for a non-toxic approach.
- Liberally spray the affected area and allow the solution to sit for at least 10 minutes to penetrate the mould.
- Scrub the surface with a brush or sponge, focusing on the mouldy areas. For stubborn mould, use a more vigorous scrubbing motion.
- Rinse the area thoroughly with water and dry completely with a clean cloth or towel.
We have a detailed guide on how to clean a vanity unit for a spotless sanctuary.
For Grout and Porous Surfaces
- Create a paste of baking soda and water. Apply the paste to the mouldy grout and surrounding areas.
- Use a toothbrush or other small brush to scrub the grout, working the paste into the mould.
- Allow the paste to sit for a few hours or overnight, if possible, to ensure it is fully treated.
- Rinse the area with water and dry thoroughly.
Dealing with Tough Mould
- If the mould is particularly resistant, you can use bleach as a last resort on non-porous surfaces, ensuring the area is well-ventilated and not mixing bleach with any other cleaning product.
- Mix one part bleach with four parts water and apply to the mouldy area. Leave the solution for no more than 15 minutes before rinsing.
Preventing Future Mould Growth
To keep your bathroom mould-free, the key is to manage moisture. Here’s how:
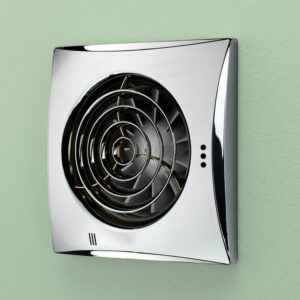
- Use a bathroom extractor fan to remove any condensation after showering or bathing.
- Keep windows ajar when the weather permits to allow for air circulation.
- Repair any leaks promptly to prevent water from accumulating in unseen areas.
- After showering, wipe down the shower enclosure with a shower squeegee. This will help to prevent any moisture and bacteria build-up.
- When maintaining or renovating your bathroom, use mould-resistant products, such as paint and caulk/ silicone.
Final Tips and Reminders
Before you finish, consider these final points:
- Regularly inspect and maintain your bathroom to catch any potential moisture issues early.
- Address any previous moisture problems that may have contributed to the growth, such as waterproofing showers or fixing damaged sealants.
- Avoid using abrasive tools that can damage surfaces. Opt for softer brushes or sponges instead.
Conclusion
With these instructions and tips, you are well-equipped to tackle the mould in your bathroom. Remember, addressing the issue promptly keeps your bathroom looking clean and fresh and contributes to a healthier indoor environment for you and your family. Take this proactive step towards maintaining a more comfortable living space today.