 Low Online Discount Prices
 Fast Delivery
 Safe and Secure Online Checkout
Bath screens are an elegant solution to keeping your bathroom dry and free from water splashes while using a shower bath. Perfect for DIY enthusiasts and renovators, a professionally installed bath screen adds both style and practicality to your bathroom. This step-by-step guide from Showers to You walks you through everything you need to know about how to install a bath screen, including its types and preparation, plus expert tips on keeping your bath screen in prime condition.
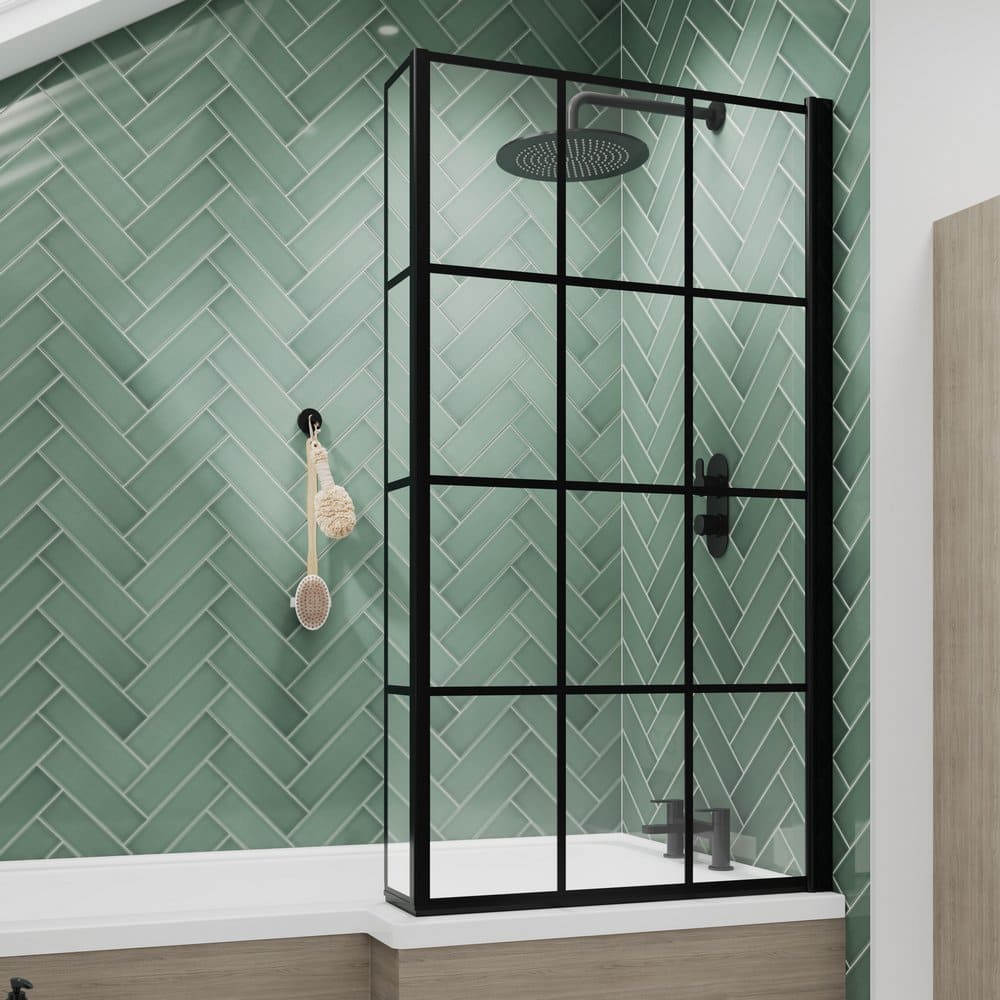
Nuie Pacific Satin Black Square Framed Hinged Bath Screen
Why Choose a Bath Screen?
Bath shower screens are essential for anyone looking to avoid the hassle of wet bathroom floors caused by traditional shower curtains. More stylish and easier to maintain than shower curtains, they add a clean, modern edge to your bathroom. Bath screens come in several configurations to suit different needs:
- Fixed Screens: Perfect for minimalist bathrooms, these remain stationary and provide firm water protection.
- Hinged Screens: These can pivot inwards or outwards for flexible access.
- Folding Screens: These concertina-style screens fold away neatly, ideal for bathrooms with limited space.
What Holds a Bath Screen in Place?
Bath screens generally consist of high-quality safety glass attached to a wall channel with sturdy screws and seals. For instance, the Merlyn Hinged Three Panel Folding Bath Screen has received high praise from reviewers like Bev B., who appreciates the large size and style but notes that it requires some getting used to because of its sturdy build. Bev mentions, “Lovely and large… No more splashed floors!“
Preparing for Installation
Before installing your bath screen, ensure you have the necessary tools and components:
Tools You’ll Need:
- Drill
- Spirit level
- Masking tape
- Screwdrivers
- Sealant gun
- Pencil
- Tape measure
- Hammer
Components Required:
- Bath screen
- Wall channel
- Screws and caps
- Wall plugs
- Bottom seal
- Silicone sealant
Pro Tip: Inspect your bath screen upon delivery for damage. Turning off the water supply at the mains is a precautionary step to avoid potential issues.
Is Installing a Bath Screen Easy?
Learning how to install a bath screen is relatively straightforward, provided you have basic DIY skills. For example, the Beaufort Chrome C Shape 5mm Curved Bath Screen is designed with ease of installation in mind. One reviewer said, “After searching plumbing suppliers and a number of sites unsuccessfully for a C-shaped bath screen, Showerstoyou had exactly what I needed. Their customer service was excellent, phoning me directly to confirm and arrange the most suitable day for delivery. The shower screen was as described and met my expectations.”
Step-by-Step Guide to Installing a Bath Screen
Follow these detailed steps to ensure perfect installation:
Step 1: Unpack and Check the Components
Carefully unpack the box and go through the installation guide to ensure all parts are present and intact.
Step 2: Prepare the Wall Channels
If your wall channel doesn’t have pre-drilled holes, drill them now, ensuring they are evenly spaced.
Step 3: Mark the Screw Positions
Position the wall channel on the wall using a spirit level, and use a pencil to mark the screw holes. Double-check the alignment. Also, confirm there are no pipes or wires where you plan to drill.
Step 4: Drill Holes and Insert Wall Plugs
Drill into your marked positions using an appropriate drill bit. Insert wall plugs to provide a secure base for screws.
Step 5: Attach the Wall Channel to the Wall
Screw the wall channel to the wall and ensure it is firmly secured. Use a spirit level again to confirm the correct alignment.
Step 6: Fit the Bath Screen into the Channel
Slide the bath screen into the wall channel carefully. Ensure it aligns snugly.
Step 7: Secure the Screen in Place
Drill through the wall channel and bath screen using a small drill bit. Screw the screen to the channel and cap the screws for a clean look.
Step 8: Attach the Bottom Seal
Fit the provided seal to the bottom of the glass panel to prevent water from leaking out.
Step 9: Add Handle or Towel Rail (if applicable)
If your bath screen includes accessories like a towel rail, now is the time to attach them, such as the Merlyn Single 800mm Square Bath Screen with Towel Rail.
Step 10: Seal the Edges
Apply a bead of silicone sealant along the outside edge of the wall channel. Avoid sealing the inside edge, as this allows water to drain back into the bath.
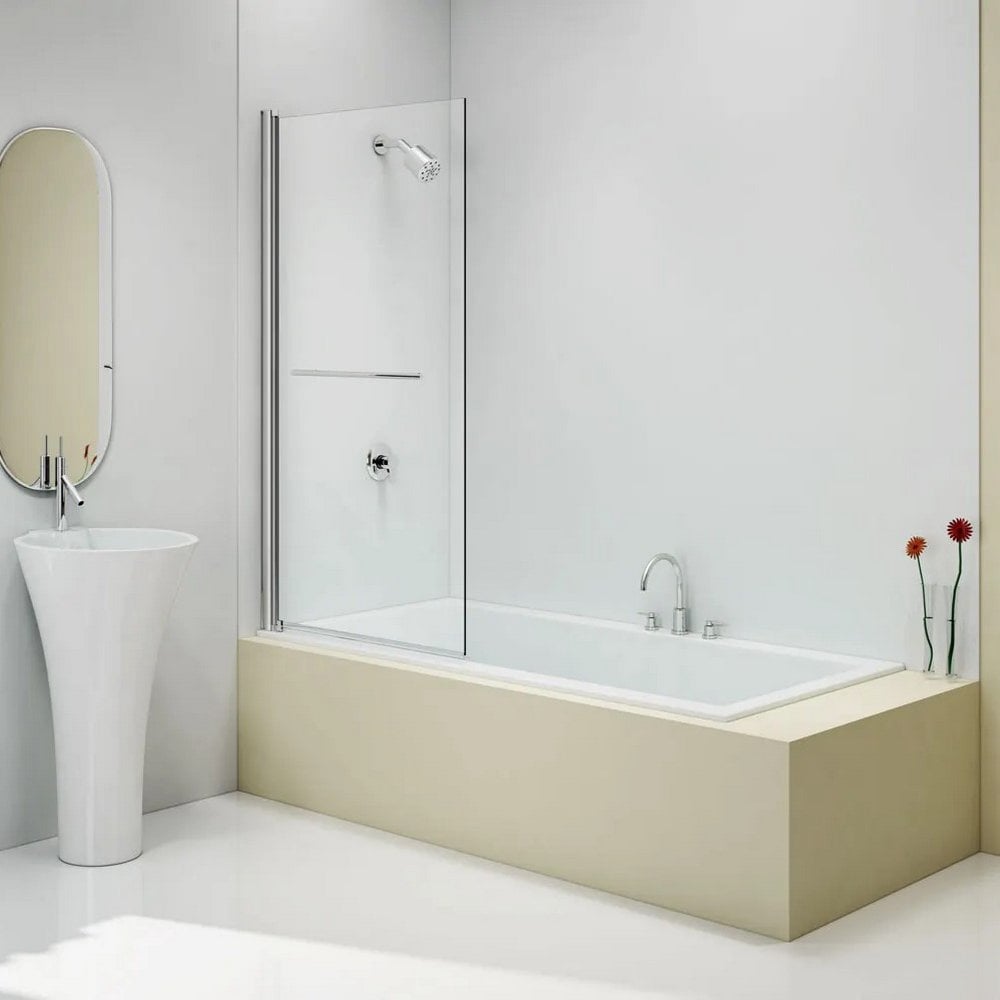
Merlyn Single 800mm Square Bath Screen with Towel Rail
Post-Installation Care
Allow the silicone sealant to cure for 24 hours before using your bath screen. This ensures a watertight seal and prolongs the life of the installation.
FAQs About Bath Screens
Do Plumbers Fit Bath Screens?
Yes, although installing a bath screen is a manageable DIY task, professional plumbers are often called in for more complex bathroom renovations or when dealing with uneven walls.
Can You Install a Shower Screen on a Freestanding Bath?
Yes, you can install a shower screen on a freestanding bath. An example of a freestanding bath suitable for a bath screen is the Tavistock Vitoria Corner Shower Bath.
Why Proper Installation Matters
A properly installed bath screen guarantees not only a dry bathroom but also a stylish and durable finish. For instance, Barry’s review of the Kudos Inspire Chrome Single Panel Bath Screen praised it: “Don’t do many reviews unless they are either really good or really bad. This is an excellent quality product. You won’t regret spending the extra“.
Start Your DIY Bath Screen Project Today
Installing a bath shower screen may seem daunting, but with the right tools, preparation, and guidance, it’s a project you can confidently take on.
Need help choosing the right bath screen? Explore our wide selection of premium bath shower screens at Showers to You! Shop now to find top-quality products backed by glowing customer reviews.