 Low Online Discount Prices
 Fast Delivery
 Safe and Secure Online Checkout

You've been mulling over it, haven't you? The idea of installing Underfloor Heating (UFH) in your home. It's a fantastic way to upgrade your living space, providing efficient and comforting heat. And guess what? It's not as complicated as it may seem, especially with the right guidance and a dash of DIY enthusiasm.
Today, Showers to You is delving into the installation process for two main types of UFH: Electric and Water underfloor heating (please see our Underfloor Heating Buying Guide for more information). Please note that this is a general guide, and your specific system may have particular requirements. Always consult the manufacturer's instructions before getting started.
Underfloor heating installation involves several steps, like cleaning the subfloor before setting up the floor heating system, installing the manifold first, and being mindful of maximum floor temperatures. Suppose you're opting for electric underfloor heating. In that case, the installation process includes carefully cutting the mesh, peeling off the protective film, and removing the white tape. Let's dive into the details and make your underfloor heating project a success.
How to Install Water Underfloor Heating
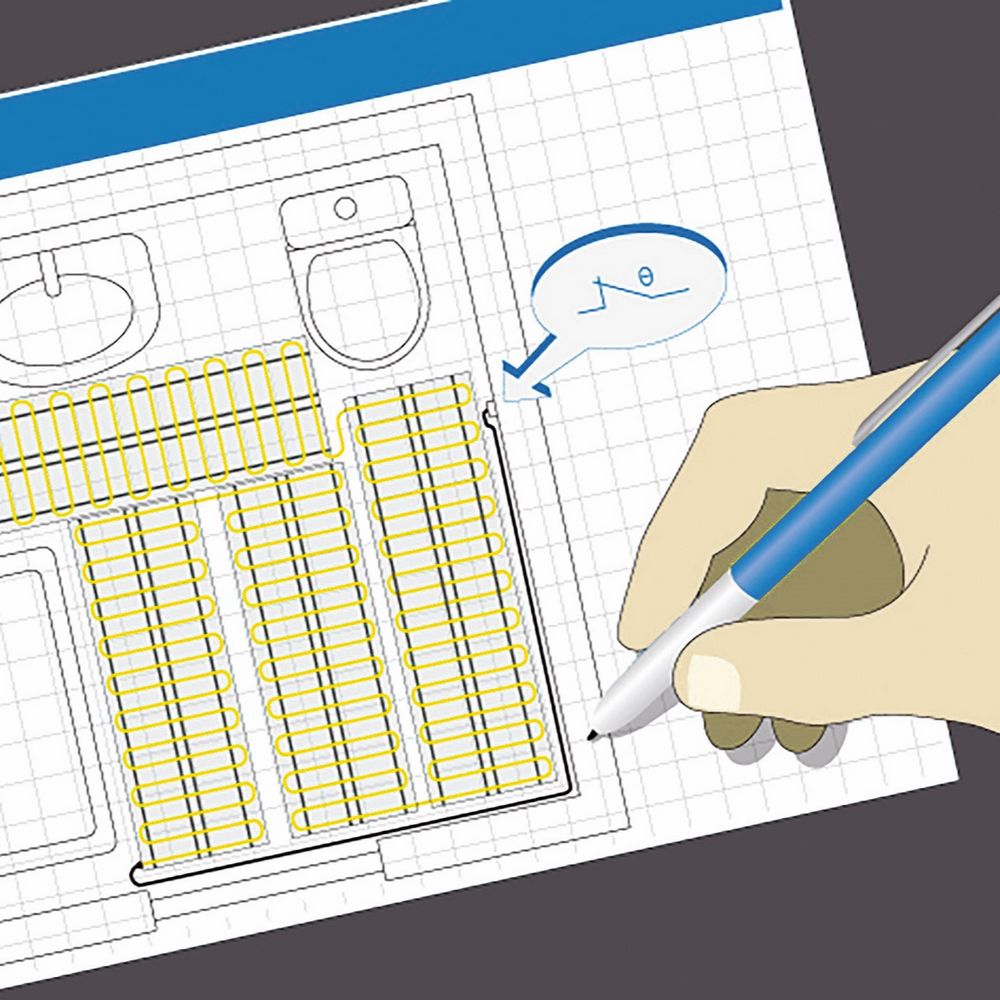
Step 1: Plan the Layout
Before starting the installation process, designing and planning your layout carefully is essential. Consider where to place your manifold and how many loops of pipe you need. Mapping out your initial plan will help you to avoid costly mistakes later in the process.
Step 2: Prepare the Surface
The surface of the area where you install the heating system must be flat and smooth. Any lumps or bumps could affect the heat distribution and efficiency of the system. If your floor is concrete, you may need to add an insulation layer to improve the system's efficiency. Ensure that the floor is entirely dry before beginning the installation process.
Step 3: Install the Pipes
Once you've marked out your layout, it is time to install the water pipes. Begin by laying the pipes in position and ensuring they fit snugly using clips to secure them. The primary running of the pipes should now be in place, which means it's time to add the manifold.
Step 4: Add the Manifold
The manifold is the controller for the heating system. It regulates the temperature and flow rate of the water, which then feeds into the pipes. Mount the manifold close to your boiler and connect it to the central supply pipework. You must ensure the manifold is level and securely fixed to the wall.
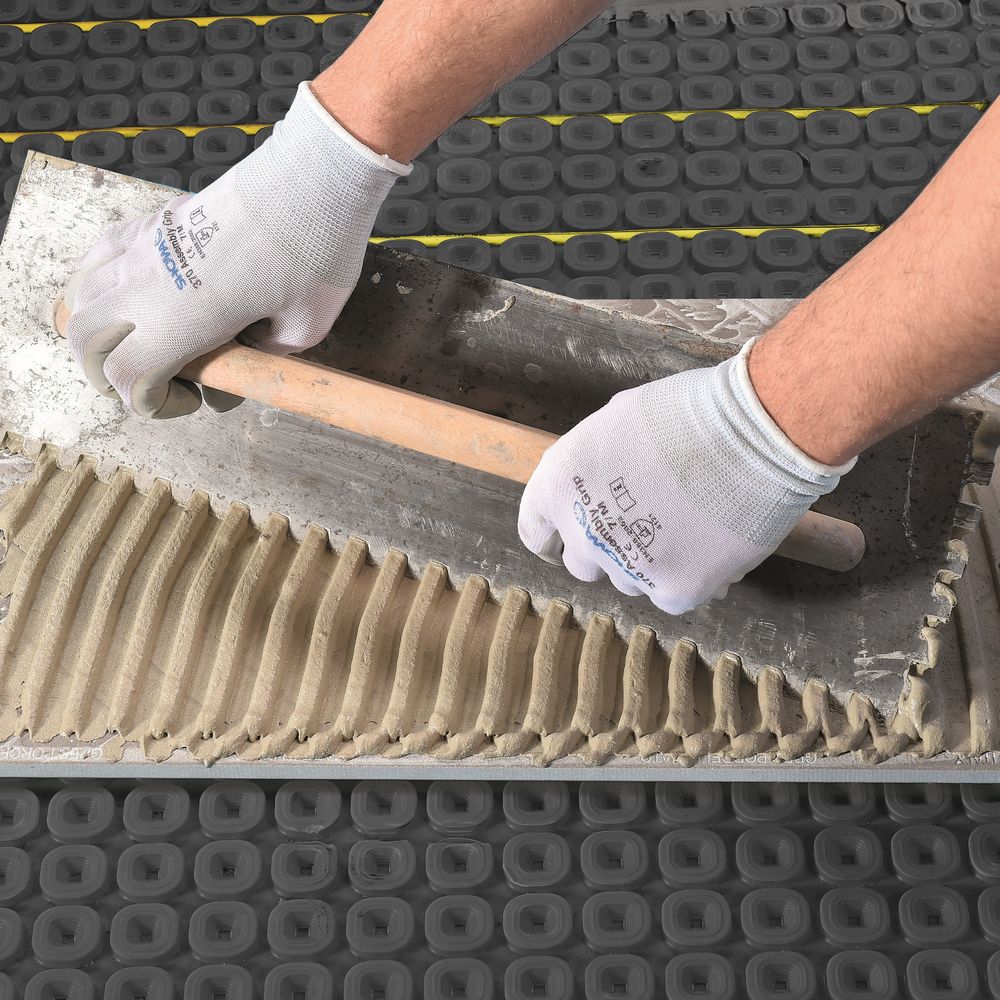
Step 5: Pressure Test and Cover the Pipes
It's essential to pressure test the heating system at a pressure of 4 bar for at least 30 minutes before the final installation to identify any leaks. Once you have completed your pressure test and are confident it's working well, cover your pipes using a floor screed and install the chosen flooring.
_23_01_2024.JPG)
How to Install Electric Underfloor Heating
Step One: Planning and Preparation
One of the first things you'll need to do is measure the area you want to heat. This will help you calculate the amount of underfloor heating cable required. Always factor in a 10% extra cable allowance to stay caught up.
Next, be sure to check the manufacturer's instructions. They may have specific requirements when it comes to subfloor preparation. You must ensure your subfloor is clean, dry, and dust-free before laying down your floor heating.
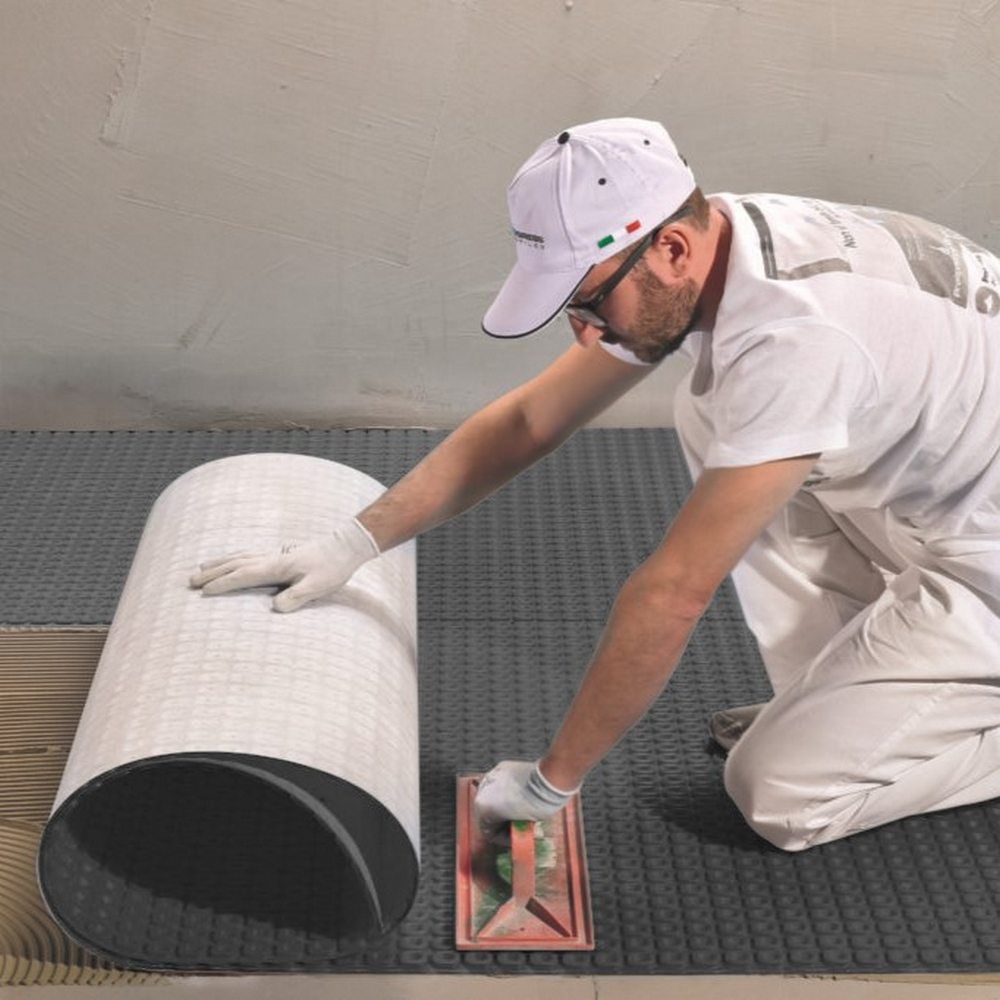
Step Two: Laying the Electric Underfloor Heating Mat
Most electric underfloor heating systems come with a mat, which is simple to install. To start, roll out the mat evenly across your floor. Next, cut the mesh around the edges to create a neat finish, and then tape any exposed cables down to the subfloor using double-sided tape. When laying the mat in the room, ensure you don't cross the wires, which can lead to overheating.
Step Three: Install Thermostat Wiring
Next, wire in your thermostat. The manufacturer's instructions will tell you where the best place to locate it. After mounting the thermostat, connect it to the supplied wiring harness. Ensure that your wiring is connected correctly. It's important to double-check your connections before securing the heater mat.
_23_01_2024.jpg)
Step Four: Connect the Electric Underfloor Heating Mat to the Thermostat
It's time to attach the floor heating mat to the thermostat. You'll need to join the mat's power lead to the thermostat. Please follow the manufacturer's instructions and diagrams carefully, as you need help connecting your wiring to be safe. Be sure to keep the power to the system turned off until you have connected everything correctly.
Step Five: Testing and Finishing
Once everything is connected, it's time to test your installation. Turn your heating mat on and check to ensure that it's working correctly. Next, you will be ready for the final stage: finishing touches. To complete the installation, you can cover the mat with your chosen flooring solution, whether tiles or engineered hardwood.
_23_01_2024.jpg)
Installing Underfloor Heating can provide countless benefits to homeowners, including energy efficiency and consistent heating throughout the home. By following the manufacturer's installation guide, you can install it yourself. However, it's always best to consult an expert when in doubt. Before installing, it's important to plan out your system and ensure your subfloor is clean, dry and level. Ensure that you also test your system to ensure it's working perfectly before enjoying the benefits of your newly installed underfloor heating system.
Why not check out our other handy guides, from How to Install a Radiator to a Buyer's Guide on Bathroom Heating.