 Low Online Discount Prices
 Fast Delivery
 Safe and Secure Online Checkout
Installing a shower tray might sound like a challenging DIY task, but with the right tools, knowledge, and preparation, it’s entirely achievable. Whether you’re renovating your bathroom or setting up a new one, fitting a shower tray correctly is essential to ensure proper drainage, watertight seals, and a long-lasting finish. This guide from Showers to You is designed for DIY enthusiasts eager to take control of their bathroom projects, offering clear instructions to help you install a shower tray with confidence.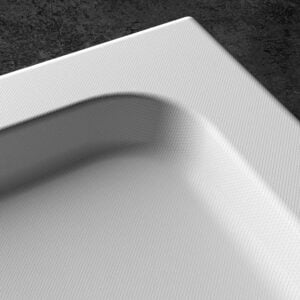
What You’ll Learn
By the end of this guide, you’ll know:
- What tools and materials you’ll need
- Whether you can install a shower tray yourself
- How to go about preparing, fitting, and sealing the tray
- Plus, answers to common questions like, “Does a shower tray need to be raised?“
Let’s get started!
Tools and Materials Required
Before you begin, gather the necessary tools and materials to ensure a smooth installation process.
Tools
- Pencil
- Tape measure
- Spirit level
- Drill and drill bits
- Safety goggles and gloves
- Silicone sealant and sealant gun
- Trowel (for low-profile trays)
- Hacksaw or jigsaw
Materials
- Shower tray
- Fixing brackets (if applicable)
- Adjustable legs (if fitting a raised tray)
- Waste trap and pipe
- Mortar (for low-profile trays)
- Velcro strips or adhesive pads (for panels)
Can I Install a Shower Tray Myself?
Yes, installing a shower tray is a manageable DIY project if you have basic handyperson skills and follow clear instructions. However, if you’re unsure of your abilities, consulting a professional is always an option. Proper installation is critical to avoid leaks or drainage issues, as these can cause long-term problems.
Keep in mind that different types of shower trays, such as low-profile and adjustable height trays, may require slightly different approaches.
Step-by-Step Guide to Installing a Shower Tray
Step 1: Preparing the Shower Base
Preparation is key. Start by ensuring the floor beneath the tray is secure and even.
- Check Strength: If the floorboards feel weak, replace them with marine plywood at least 20mm thick.
- Mark Layout: Place the tray in the desired position and use a pencil to mark its outline and the waste hole location.
- Create Access (Low-Profile Trays): If your tray doesn’t have space for pipes underneath, cut an access hatch on the floor near the waste outlet.
Step 2: Fit and Level the Tray
A level tray is essential for proper drainage…
For Adjustable-Height Trays
Begin by securely attaching the legs to the tray. Adjust the height of each leg carefully using a spirit level to ensure the tray is completely level. Once adjusted, double-check the level before proceeding.
For Standard Shower Trays
Place the tray directly onto the prepared base area. Ensure the surface is completely flat and free of debris before positioning the tray. Use a spirit level to confirm the tray sits evenly. If adjustments are needed, use appropriate shims or supports to achieve a level installation.
For Low-Profile Trays
Apply an even layer of mortar across the base area. Gently press the tray into position, making sure it is level using a spirit level. Allow the mortar to set and dry for at least 24 hours before continuing with the installation.
Step 3: What to Put Under a Shower Tray?
For low-profile shower trays, a mortar mix (one part cement to four parts sand) provides a sturdy and even base. Raised trays rely on leg assemblies and riser kits to lift and support the tray.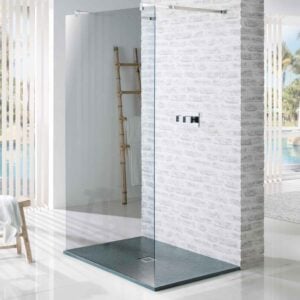
Step 4: Securing the Tray to the Floor
To secure your tray:
- Adjustable Tray: Fix the leg assemblies with adhesive pads or Velcro.
- Low-Profile and Standard Shower Tray: Once the mortar has been set, ensure the tray is firmly in place and doesn’t rock or move.
Step 5: Connecting the Waste Pipe and Testing
- Connect the waste trap to the tray outlet and attach it to the waste pipe.
- Test the drain by pouring water into the tray from a jug or kettle, checking for leaks or slow drainage.
- Adjust connections if necessary to ensure a watertight fit.
Step 6: Sealing the Tray
Apply silicone sealant around the edges where the tray meets the wall. This primary seal prevents water leaks. After the walls are tiled, add a secondary seal between the bottom edge of the tiles and the tray for additional protection.
Common Questions About Shower Tray Installation
For a comprehensive set of FAQs about Shower Trays, see our complete guide now!
Does a Shower Tray Need to Be Raised?
Not always. Standard shower trays, designed to sit directly onto a flat and prepared base, provide a straightforward installation option without the need for additional height adjustments. Adjustable height trays are useful for concealing pipes or ensuring adequate pipe drainage gradients. Low-profile trays, which sit directly on the floor, are ideal for step-free, modern designs but require piping access underneath the floor.
Can a Shower Tray Be Cut to Size?
Some trays, like the Novellini Novosolid Shower Trays and MX Durastone Shower Trays, can be cut to fit awkward spaces. Always check the manufacturer’s guidelines before attempting to alter your tray, or get in touch with one of our experts for further guidance.
Martin C gave the MX 760mm Square Durastone Shower Tray With Upstands 4 stars out of 5, saying: “The tray is very light but has an upstand of about 15mm all round with the drain outlet central on one side, it has been in now for a few weeks and has performed well and stopped the overflow of water that the previous tray couldn’t handle…The trap that came with it is very good also and was easy to fit“.
Do You Install a Shower Tray Before Tiling the Floor?
Yes, always install the shower tray before tiling. This ensures a watertight seal and prevents potential gaps between the tray and tiles. Leave a small gap (around 3mm) between the tray and the tiles for a clean finish. For further guidance, read through our Shower Tray Buying Guide for more information.
Troubleshooting Common Issues
- Leaking Waste Pipe: Check that all connections are tight and seals are applied correctly.
- Tray Not Level: Use the spirit level to adjust the legs (for adjustable trays) or reapply mortar if using a low-profile tray.
- Drainage Problems: Ensure the waste pipe has an adequate fall (usually 50mm per metre of length) to carry water away effectively.
Tips for Maintaining Your Shower Tray
Once installed, proper maintenance will keep your shower tray in top condition:
- Regular Cleaning: Use non-abrasive cleaners to remove soap scum and limescale.
- Prevent Mould: Clean silicone seals with mould-removing sprays regularly.
- Avoid Heavy Impacts: Dropping heavy objects onto the tray can cause cracks or chips.
For more information, read through our blog post on How to Clean a Shower Tray.
Make Your Bathroom Installation a Success
By following these steps, you’ll have a secure, watertight shower tray that updates your bathroom’s functionality and style. With a bit of preparation and patience, this is a rewarding project for any DIY enthusiast.
For more innovative bathroom solutions, browse our range of shower trays, accessories, and expert tips at Showers to You. Call us today at 01472 242159 or contact us through our easy-to-use contact form for more information!