 Low Online Discount Prices
 Fast Delivery
 Safe and Secure Online Checkout
How to fit a shower enclosure
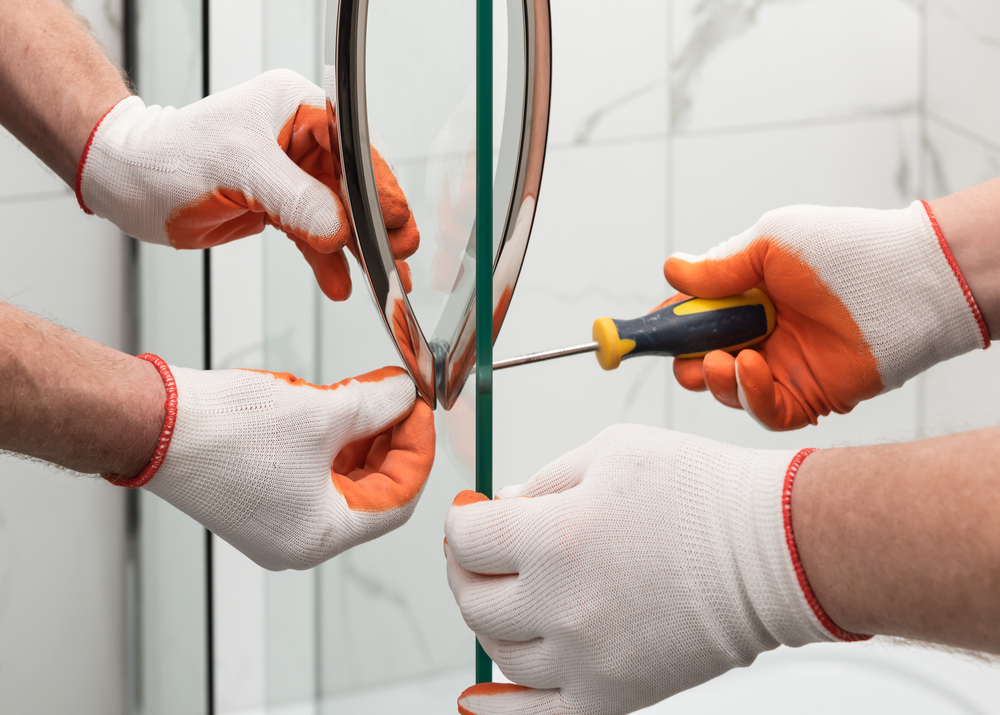
Photo credit: DUO Studio / Shutterstock
For those of us who lead a hectic lifestyle and don’t have time for long soaks in the bath or don’t have the space for a bathtub, buying a shower enclosure is the perfect compromise.
Whether you are renovating a big family bathroom or a tiny en-suite, these low maintenance, durable facilities are perfect for optimising space within the bathroom, whilst still providing sufficient room to shower comfortably.
There are many different shower enclosure styles on the market, however, the process of fitting a shower enclosure is pretty much the same regardless of where you are installing it, or the shape and size.
Please note: This guide doesn’t include how to measure and install a shower tray; this should be done beforehand.
How easy is it to install a shower enclosure?
The good news is that installing a shower enclosure is a relatively straightforward job and should take no longer than a day to complete.
Provided you have a good knowledge of DIY and the right tools, then you should be able to fit a shower enclosure yourself. Although, for health and safety reasons, we would recommend the help of an additional person with some of the lifting.
Step by step guide: How to install your shower enclosure
1. Check your shower enclosure kit and prepare the area
Every shower enclosure should come with a manufacturer’s guide that lists all parts and instructions. Before you begin to assemble your shower enclosure, it is worth checking that you have all parts necessary to complete the installation.
You should also check for any damages or faults - it’s better to find out now rather than during or after installation.
Before proceeding any further, make sure that you turn off the water at the mains before beginning any work in the bathroom.
2. Make sure you have the correct equipment
Depending on the area in which you are installing the shower enclosure will determine the types of tools you may need. It is always worth making sure you have access to the following:
● Claw hammer
● Electric drill
● Hack saw
● Sealant gun
● Spirit level
● Standard screwdrivers
● Tape measure
● Wood chisels
● Pencil
It might be that you do not end up using all of these tools; however, you don’t want to get halfway through the job and discover that you need them.
3. Install the shower enclosure brackets
Vertical brackets are important as they hold the shower enclosure in place over the shower tray. You should fix them to the wall using screws and then tighten the enclosure frame to each bracket.
Top tip: Use your spirit level to ensure they are level before you fix them to the wall and mark the positions with a pencil, so you know where to drill.
Drill pilot holes into the wall first before pushing the rawlplug through - be careful not to drill into any piping or wiring.
The surface you are attaching it to will determine the type of drill bit you will need in order to make a sufficiently sized hole. For example, if you are drilling into tiling, you will need a masonry drill bit to avoid shattering the tiles.
4. Fit the shower enclosure frame
Once you have attached the wall brackets, and they are securely in place, you should assemble the shower enclosure frame and place it onto them. You may need someone else’s help at this stage to help attach it.
Attach the glass panel onto the base frame using the fixing screws, then fix the second upright glass panel to the frame.
Finally, fix sealing strips onto the top of each glass panel.
5. Fix the shower enclosure into the correct position
Once the shower enclosure frame is correctly assembled, you will need to position it onto the shower tray.
Carefully lift the shower enclosure onto the shower tray.
At this point, you need to decide which side the door will be on. Once you have come to a decision, then start with the side panel and slide it into the vertical brackets according to the manufacturer’s instructions.
Check that there is no gap between the shower enclosure frame and the tray; otherwise, when you come to turn the shower on, it will let water out into the bathroom.
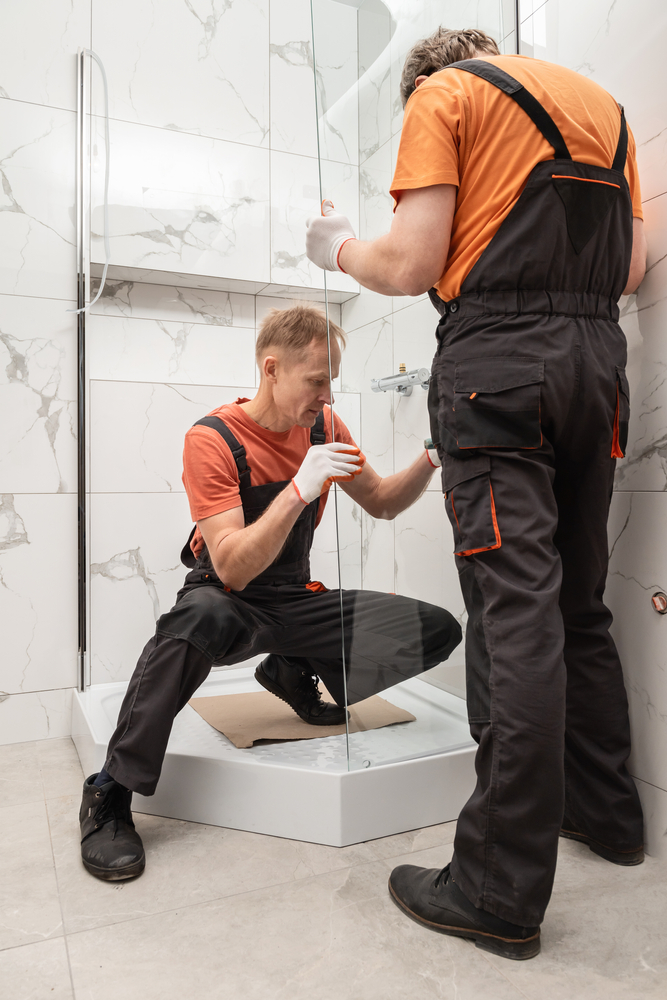
Photo credit: DUO Studio / Shutterstock
6. Assemble the sliding shower doors and rollers
Once the shower enclosure frame is firmly in position, unpack the shower door rollers and place each one over the fixing hole.
Next, fix the fixed rollers to the top of the door and the movable spring-loaded rollers onto the sliding door. It is important to do this with a handheld screwdriver and not a drill.
Finally, place the cover over the back of the hole and fix the screw.
7. Place the door onto the frame
After the sliding door and rollers are fitted, you can put the door onto the frame.
Lift and place the sliding door onto the shower enclosure frame and push it down into place on the rollers - you should hear a snap to indicate they are clipped in.
Repeat this for the second door, ensuring the gap between the sliding doors is even all the way down. If it is not, then unclip them and start again.
8. Screw the handles onto the door
You should position the handles onto the doors from the outside, and secure a screw through each fixing bracket into the handle.
9. Assemble the shower enclosure door seals
Door seals are an important part of the shower enclosure as they stop any water from getting out of the shower area into your bathroom.
There are normally six strips included, and they should be applied to fixed shower glass panels simply by pushing them on.
10. Fix the shower frame onto the brackets
Now that everything is in place and in the correct position, it’s time to secure it to the vertical brackets.
To do this, you will need to drill 2-3mm from each of the vertical brackets, meaning approximately three to six holes running from top to bottom.
Slide the correct sized screw into the screw cup and cover. Screw it up and pop the cap over the end.
11. Apply the covers to brackets
Over time, water can cause rusting of the door brackets. Therefore covers are provided in order to prevent water from getting to them, protecting them and making them last longer.
To apply them, simply push the covers over the top of each bracket, ensuring they are pushed on properly to not let water through.
12. Apply sealant to the shower enclosure
A silicone sealant is applied to provide a water-resistant seal around the shower enclosure. Again, this is to make it more durable to the effects of water and protect it for longer.
You should apply this using a sealant gun along the outside of the shower enclosure and along the base of the shower. Once applied, run a damp cloth along the surface to ensure it has adequately filled the space. Do not seal the inside edges.
Once all areas have been filled, leave to dry for at least 24 hours and ensure the room is well ventilated and hey presto! Your new shower enclosure is installed and ready to use. Remember to turn the water back on first, though.
Why choose ShowerstoYou?
Here at ShowerstoYou, we guarantee that you will be able to find the perfect shower enclosure to fit your bathroom suite. Our high-quality range of products means that there is something out there for everyone, regardless of your bathroom's size, shape, and requirements.
Browse our collection today of leading shower brands to help you find your dream shower.
If you have any questions, please feel free to contact us, where our team of dedicated experts are on hand to help in whatever way they can.